

Homemade Jamaican Dragon Stout Ice Cream Recipe
Here is another ice cream recipe that I am honestly so excited to bring to you today: Dragon Stout Ice Cream.
This flavor alone brings back a lot of memories for me. I remember being a kid and going to Devon House, and this was always my order. It’s rich, creamy, and that hint of stout gives it that lovely flavor.

| Tool | Why I Love It | Link |
|---|---|---|
| Ammeloo Hybrid | Versatile and perfect for everyday use | Shop Now |
| Cooking Utensils Set | Complete set for easy meal prep | Shop Now |
| Kikcoin Pots & Pans + Baking | Durable, non-stick, great for baking | Shop Now |
Disclosure: Some links are affiliate links. I may earn a small commission at no extra cost to you.
No, this recipe does not require an ice cream machine. It’s a simple no-churn dessert that is SO satisfying. It is difficult to explain how Caribbean stout tastes in an ice cream.
I am here, writing this introduction, and can’t get the words out. Let’s just say it has a deep flavor, and YOU NEED TO TRY THIS ICE CREAM FOR YOURSELF.
Spoiler alert: I found the words below.
Why You Will Love This Recipe
No Fussy Equipment: No need for an expensive ice cream maker because this is a true no-churn Dragon Stout ice cream.
Deep, Rich Flavor: The stout provides a complex, malty flavor that is both hot and cold, and unbelievably delicious.
Simple Ingredients: Only four main ingredients, plus a few spices. It’s surprisingly easy.
A Taste of Nostalgia: For many, this is a classic Caribbean favorite, an absolute must-try dessert!
Tips That Worked for Me
Keep Everything Cold
This doesn’t look like a big deal, but it changes everything. Your double cream (or whipping cream), evaporated milk, and stout should all be nice and cold, right out of the fridge or even chilled overnight. Cold fat whips better and holds its stiff peaks longer, which is the foundation of your creamy, no-churn texture.
Work for Those Stiff Peaks
You’re aiming for stiff peaks in your whipped cream. This is where I kept tweaking the process until I got a better handle on it. Whether you use a hand mixer or a hand whisk (and yes, you can definitely use a hand whisk), you need the cream to be firm enough that when you lift the beaters, the peak stands up straight and doesn’t flop over.
Dragon Stout Ice Cream Ingredients
This recipe makes approximately 1 pint of rich, comforting ice cream.
- 1 bottle Dragon Stout (cold) — the star of the show
- ½ cup Evaporated Milk (cold) — adds creaminess and flavor
- ½ can Condensed Milk (cold) — sweetener; adjust to taste
- 2 cups Double Cream or Whipping Cream (cold) — must be very cold to whip properly
- ½ teaspoon Nutmeg — a hint of warmth
- 1 teaspoon Vanilla Extract — rounds out the flavors
Step-by-Step Instructions
This is actually doable, I promise! Just take your time with the whipping and mixing.
Combine the Stout and Milks
In a mixing bowl, pour out your cold Dragon Stout. Add the ½ cup of cold evaporated milk and about half a can of the cold condensed milk. Now, you need to stir this. Honestly, this takes a little work because you really have to ensure that the condensed milk doesn’t just hang out at the bottom of the bowl. Stir it well until it’s fully combined.
Whip the Cream
In a separate bowl, pour in your 2 cups of cold double cream. Using your hand mixer (or a whisk, if you’re really looking for a workout), start whipping. You need to whip this until it forms stiff peaks. This is where you’ll be there stirring and stirring, but keep at it until the texture is visibly changing, getting thicker and creamier. If you lift the mixer, the peak should stand up firm.
Gently Fold in the Stout Mixture
Once your cream is stiff, it’s time to bring it all together. Gradually add the stout and milk mixture to the whipped cream. Add a small amount, then gently fold it in with a spatula.
You are trying to maintain the air you whipped into the cream, so no heavy-handed mixing here. Learning as I went, I realized this slow, patient folding is the shift that made everything feel lighter and creamier. Add, fold, add, fold, until everything is just combined and you’ve added the rest of the stout-milk mix.
Flavor and Taste-Test
Now, mix in the ½ teaspoon of nutmeg and 1 teaspoon of vanilla extract. I like tasting the mixture to see if you want more of that malty stout flavor or if you need to sweeten it up with a bit more condensed milk. Adjust now to make it exactly the way you like it.
Freeze
Pour the mixture into your chosen freezer-safe container; a bread tin works great. Cover the surface with greaseproof paper, or use a container with a tight-fitting lid. Pop it into the freezer for about 7 hours to allow it to set up properly.
Scoop and Enjoy
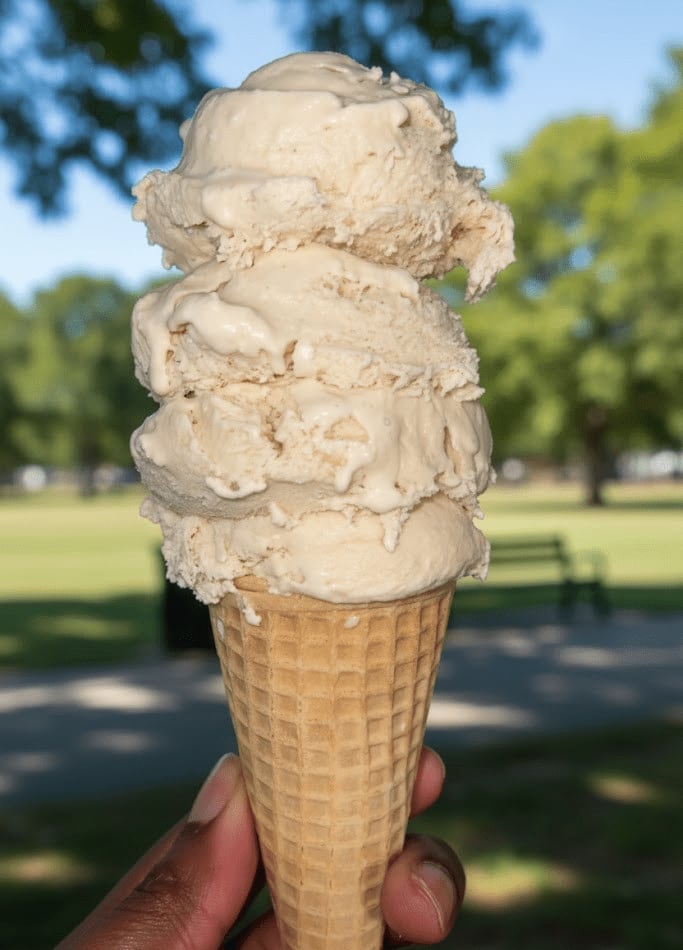
After 7 hours, it’s time for the scoop. Grab your scoop and release it into a bowl.

Leftovers and Storage
Store your leftover homemade Dragon Stout Ice Cream in an airtight container in the freezer. My homemade ice cream usually stays good for 2 to 3 weeks, though I’d be impressed if it lasted that long.
To avoid freezer burn, you can press a layer of parchment paper directly onto the surface of the ice cream before securing the lid. When serving, let it sit on the counter for 5 to 10 minutes to soften slightly for the perfect scoop.
There you have it, a no-fuss, incredibly rewarding recipe for the creamiest, most satisfying Jamaican Dragon Stout ice cream. This truly is one of my all-time favorite desserts, and I am so happy to share what I’ve learned with you.
Trust me, once you try this homemade version, you’ll agree it just might be the best stout-flavored ice cream out there. Now go ahead, try this recipe, and let me know how much you love it!
More Ice Cream Recipes
Homemade Jamaican Dragon Stout Ice Cream Recipe
Course: DessertCuisine: JamaicanDifficulty: Easy6-8
servings20
minutes360
kcalThis Dragon Stout Ice Cream is a bold, no-churn Caribbean dessert that blends rich stout flavor with velvety cream and warm spices.
Ingredients
1 bottle Dragon Stout (cold)
½ cup Evaporated Milk (cold)
½ can Condensed Milk (cold)
2 cups Double Cream or Whipping Cream (cold)
½ teaspoon Nutmeg
1 teaspoon Vanilla Extract
Directions
- In a mixing bowl, pour out your cold Dragon Stout. Add the ½ cup of cold evaporated milk and about half a can of the cold condensed milk. Now, you need to stir this. Honestly, this takes a little work because you really have to ensure that the condensed milk doesn’t just hang out at the bottom of the bowl. Stir it well until it’s fully combined.
- In a separate bowl, pour in your 2 cups of cold double cream. Using your hand mixer (or a whisk, if you’re really looking for a workout), start whipping. You need to whip this until it forms stiff peaks. This is where you’ll be there stirring and stirring, but keep at it until the texture is visibly changing, getting thicker and creamier. If you lift the mixer, the peak should stand up firm.
- Once your cream is stiff, it’s time to bring it all together. Gradually add the stout and milk mixture to the whipped cream. Add a small amount, then gently fold it in with a spatula.
- You are trying to maintain the air you whipped into the cream, so no heavy-handed mixing here. Learning as I went, I realized this slow, patient folding is the shift that made everything feel lighter and creamier. Add, fold, add, fold, until everything is just combined and you’ve added the rest of the stout-milk mix.
- Now, mix in the ½ teaspoon of nutmeg and 1 teaspoon of vanilla extract. I like tasting the mixture to see if you want more of that malty stout flavor or if you need to sweeten it up with a bit more condensed milk. Adjust now to make it exactly the way you like it.
- Pour the mixture into your chosen freezer-safe container; a bread tin works great. Cover the surface with greaseproof paper or use a container with a tight-fitting lid. Pop it into the freezer for about 7 hours to allow it to set up properly.
- After 7 hours, it’s time for the scoop. Grab your scoop and release it into a bowl.
Notes
- While the hands-on prep takes about 20 minutes, this is a no-churn ice cream, so freezing time is essential. You’ll need at least 7 hours in the freezer for the ice cream to set properly.
